Introduction
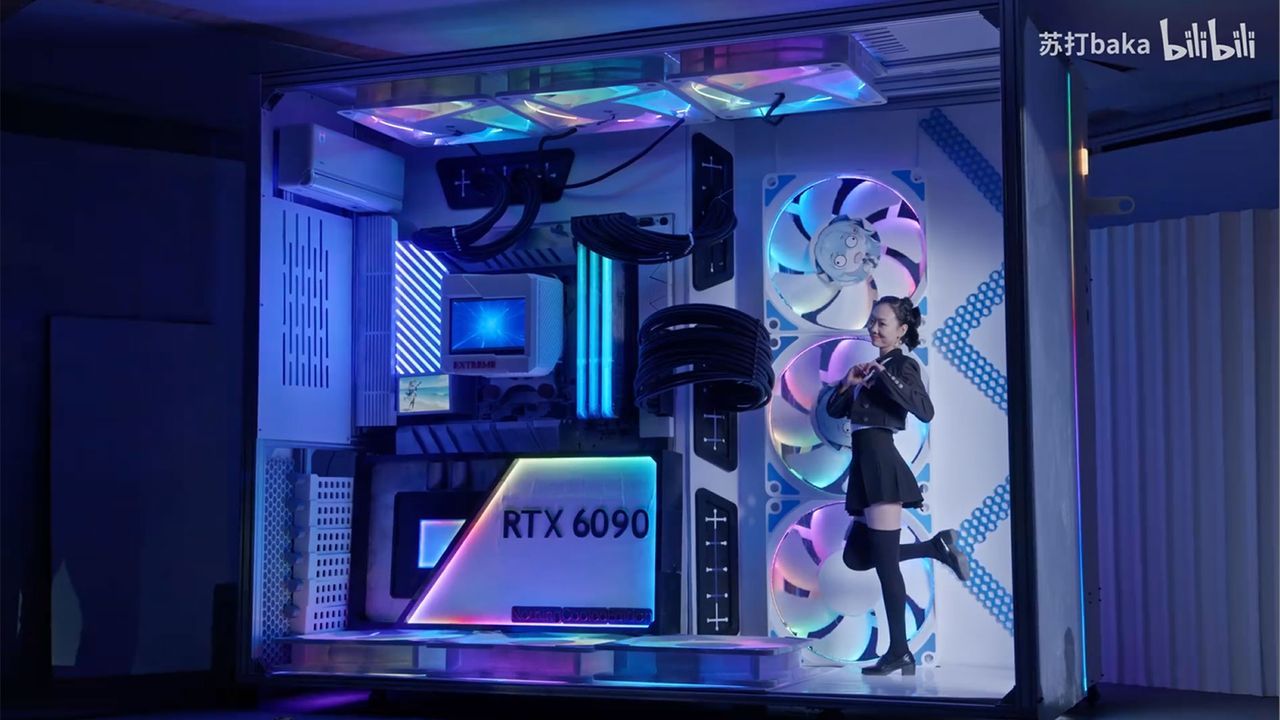
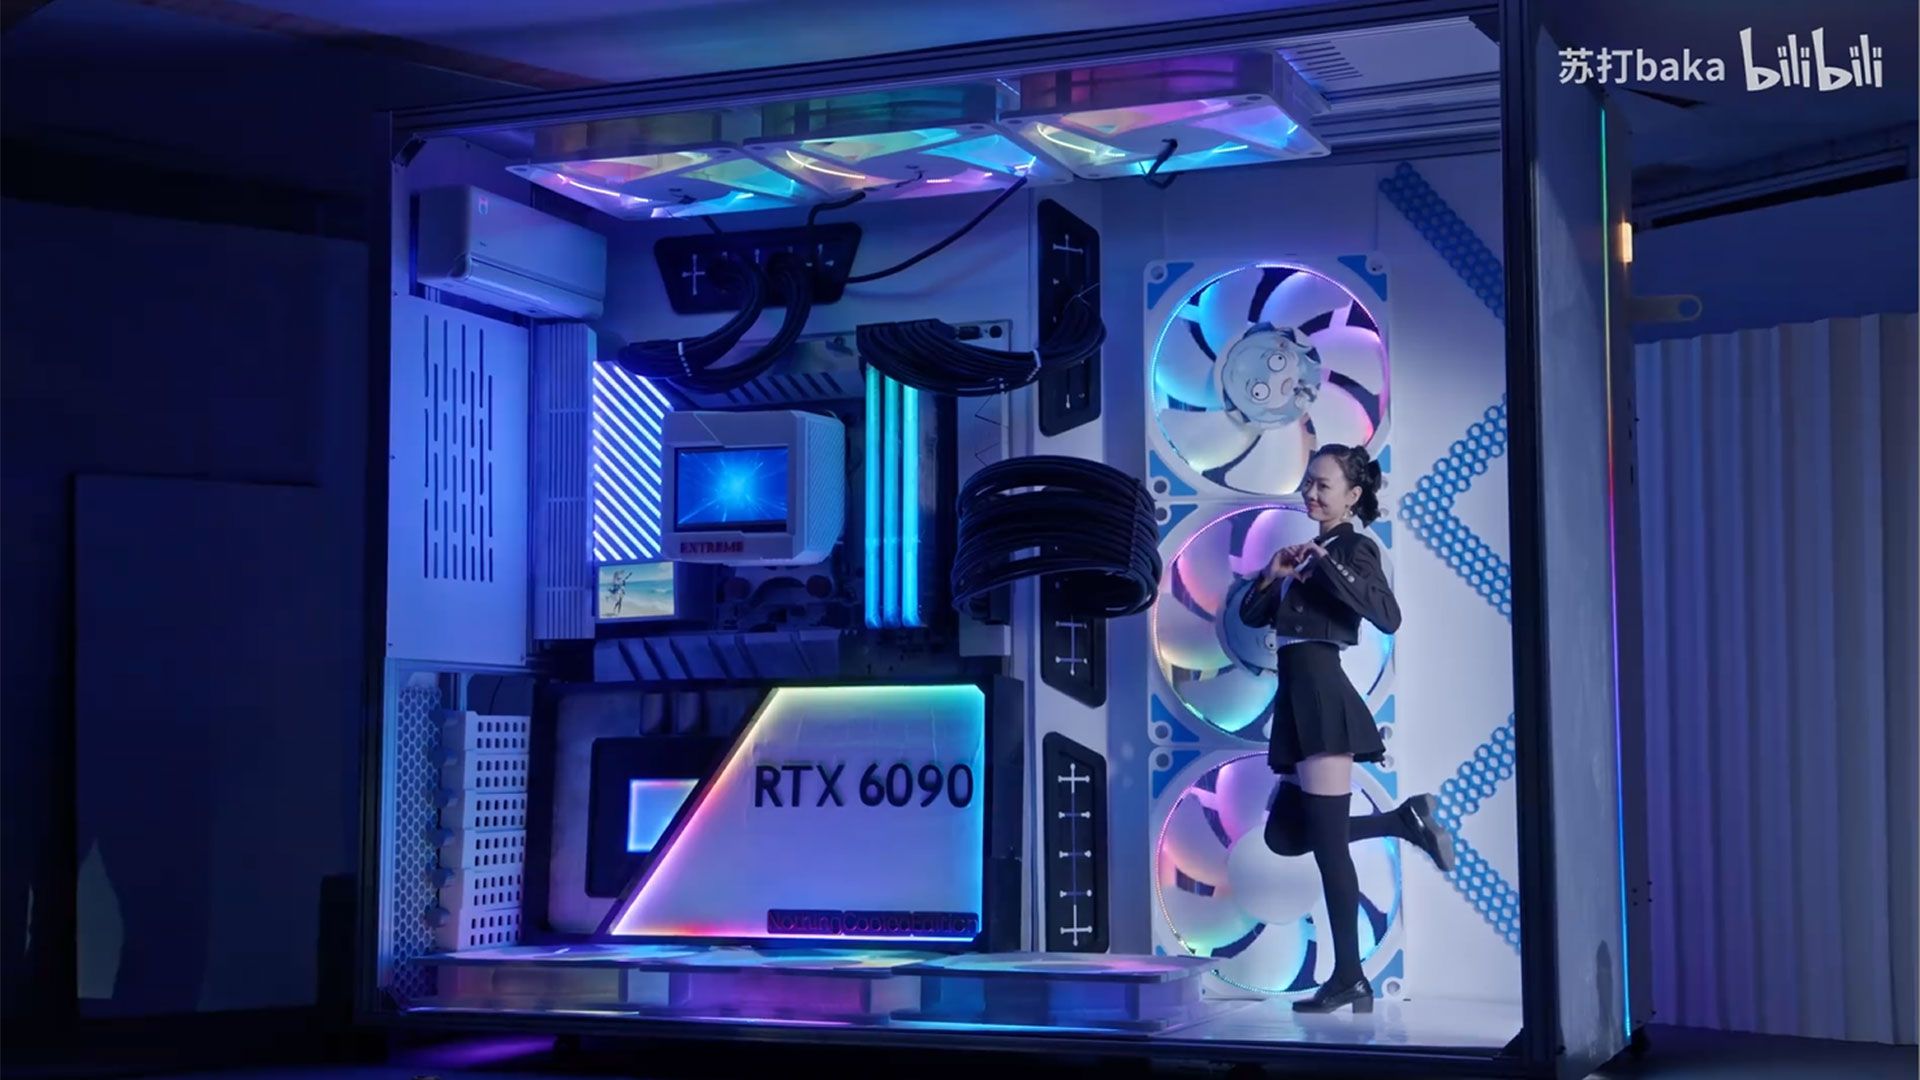
Imagine a computer so massive that you can actually step inside it and work, play, or just lounge while surrounded by RGB lighting and cool air conditioning. A Chinese TechTuber made this dream a reality by scaling up a standard PC tower to human proportions. The result looks like a giant fish tank case where the occupant appears as a tiny figurine. In this guide, we’ll walk you through the process of building your own habitable PC tower. While this is an extreme DIY project, the principles are an extension of custom PC building with a dose of architectural construction.
What You Need
Before you start, gather the following materials and tools. Many items are oversized versions of typical PC components.
- Structural frame – Aluminum extrusion or steel profile (80/20 type) for the case chassis. Approx. 2m x 2m x 2m cube size.
- Clear panels – 4mm tempered glass or acrylic sheets for the sides and top. Alternatively, use polycarbonate for safety.
- Computer hardware – High-end motherboard (e.g., Threadripper or Intel Xeon), CPU, GPU (multiple if needed), RAM, PSU (at least 1600W), storage drives.
- Liquid cooling system – A custom loop with multiple radiators (560mm or larger), pump, reservoir, and enough tubing to reach every corner.
- Air conditioning unit – A small split-type or window AC unit modified to cool the interior space. Must be energy efficient and controllable.
- RGB lighting – Addressable LED strips, controller, and synchronization software. Aim for at least 10 meters of strips.
- Power distribution – Heavy-duty power cord, surge protector, and possibly a sub-panel if using AC.
- Furniture – A comfortable chair, desk surface, and maybe a small table inside.
- Ventilation – Fans (200mm+) for air circulation, plus dust filters.
- Tools – Drill, screwdrivers, rivet gun, heat gun, wire cutters, measuring tape, safety goggles, gloves.
Step-by-Step Instructions
Step 1: Plan Your Dimensions and Layout
Decide the size of the case. A 2m x 2m x 2m cube is comfortable for one person. Draw a floor plan: where the PC components sit (on shelves or stands), where you will be seated, and where the AC unit will go. Ensure easy access to power outlets and ventilation. Mark positions for glass panels (at least one door).
Step 2: Build the Frame
Cut and assemble the aluminum extrusions into a cube frame. Use brackets and T-nuts to connect pieces. Reinforce corners with L-brackets. Make sure it’s square and stable. For extra rigidity, add cross braces on the back and top. This frame will support all the weight.
Step 3: Install the Floor and Ceiling Panels
Attach plywood or acrylic sheets to the bottom and top of the frame. The floor must be strong enough to hold you, furniture, and PC gear. Use screws through pre-drilled holes. Seal edges with silicone to prevent dust ingress. If desired, install a raised floor to run cables underneath.
Step 4: Mount the Computer Components
Create shelves or mounting plates within the frame to hold the motherboard, GPU(s), PSU, and storage. Use standoffs and vibration dampeners. Secure everything so it doesn’t move during use. Route cables neatly – this is crucial for airflow and aesthetics. Install the liquid cooling loop: radiator(s) against one wall, pump and reservoir near the bottom for easy maintenance.
Step 5: Integrate the Air Conditioning System
Place the indoor unit of a split AC system on a high shelf or mount it on the wall. Cut a hole in the frame for the coolant lines and drain. Seal the hole with foam. Run the coolant lines to the outdoor condenser unit (placed outside your building). Alternatively, use a portable AC unit with exhaust vented outside. Test the AC for correct operation before sealing the panels.
Step 6: Install the Glass Panels and Door
Attach the tempered glass panels using hinges or sliding tracks. For safety, use tempered glass and consider a safety film. Create a door – either lift-off or hinged. Ensure the panels can be removed for maintenance. Apply rubber gaskets around edges to prevent vibration and dust leaks.
Step 7: Add RGB Lighting and Cable Management
Stick addressable LED strips along the inside edges of the frame or behind the glass. Connect to a controller that syncs with your PC’s software (e.g., Corsair iCUE). Hide all lighting cables within cable channels. This is the step that gives the “fish tank” look.
Step 8: Furnish the Interior
Place a comfortable chair, a small desk, and any peripherals you’ll use. Ensure that the chair does not block airflow. Consider adding a small rug or soundproofing foam to reduce echo. Position monitors (if using) on the shelves or on a VESA mount attached to the frame.
Step 9: Power Up and Test
Connect all power plugs to the surge protector. Turn on the PSU first, then the PC. Check temperatures under load. Verify that the AC system cools the interior to a comfortable level (70–75°F). Run a stress test on CPU and GPU to ensure no hotspots. Adjust fan curves and RGB settings.
Step 10: Final Safety and Comfort Checks
Ensure there is a clear emergency exit – the door must open easily from inside. Test that all electrical components are grounded properly. Check for any sharp edges. Install a smoke detector and a small fire extinguisher. Add interior lighting (above and beyond RGB). Enjoy your new “human” PC.
Tips for Success
- Acoustics matter – Large fans and liquid cooling help keep noise down. Consider sound-dampening foam inside the case.
- Airflow is king – Even with AC, you need good internal circulation. Use two large fans (one intake, one exhaust) to move air across the components.
- Weight distribution – Place heavy items like the PSU and AC near the bottom to lower the center of gravity.
- Power consumption – A high-end PC plus AC can draw a lot of power. Make sure your circuits can handle it. Consider a dedicated 20A circuit.
- Maintenance access – Design the panels so you can easily reach the inside for cleaning and upgrades. Hinged or sliding panels work best.
- Safety first – Tempered glass can shatter. Use safety film or acrylic. Keep all edges smooth. Have a first-aid kit nearby.
- Legal and building codes – Check if your local codes allow a large indoor structure. You may need to install a fire alarm or sprinkler.
- Have fun with it – This is an extreme enthusiast build. Don’t forget to personalize it with decals, themed colors, and maybe even a mini fridge inside.
Following these steps will help you create a unique, livable PC case that will make you feel like a figurine in your own digital aquarium. Good luck, and may your framerates be high and your temperatures low.